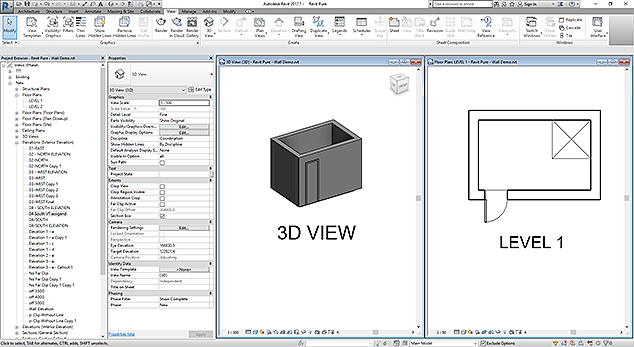
1- KEEP A 3D VIEW OPEN
Revit is about building a model. Watching your model grow in a 3D view is fun.
Many beginners spend hours trying to understand what they are seeing on their screen, and they fail because they don't bother looking at a 3D view. Create a default isometric view and use Window Tile (shortcut: WT) to split opened views.

2- DON'T GO BACK TO AUTOCAD
One of the persisting myths about Revit is that detailing sucks and you should go back to AutoCAD for that part.Learn how to properly use Detail Components and Groups. You'll become much faster than in AutoCAD.
More than just detailing, many users also use AutoCAD for various linked views. This can be a nightmare to manage. Try to use 100% Revit for everything.
3- LEARN THE MOST USED SHORTCUTS
Learn shortcuts. You'll save a lot of time. Here are the ones I use most frequently:
Model:
WA: Wall
DR: Door
RM: Room
LI: Model Line
Annotation:
TG: Tag by Category
TX: Text
DL: Detail Line
RT: Room Tag
EL: Spot Elevation
Modify:
AL: Align
CS: Create Similar
MA: Match Type Properties
MV: Move
MM: Mirror
OF: Offset
TR: Trim
RO: Rotate
WT: Window Tile
TL: Thin Lines
Some tools don't have default shortcuts but you should add one. Type KS to access the shortcuts menu. Then search for a tool and add these shortcut:
CH: Close Hidden
WP: Set Workplane
JN: Join
UJ: Unjoin
RI: Region
4- DON'T OVERUSE 2D ELEMENTS
Sometimes, it makes sense in a small project to "cheat" by using detailing lines and regions to cover up rough model parts. But most of the time, these 2D techniques cause problems down the road, especially if you are working on a model with many people.
Take the time to create a proper 3D model and use good quality families. That's more time initially, but it's almost always worth it.
5- CREATE VIEW TEMPLATES
Do you waste a lot of time setting up views?
You should adjust settings for views once. Then store them in a View Template and apply them to both existing view and views that are not yet created. In the example below, we create a view template for an elevation:

Then we assign the view template to another elevation:

We now modify the elevation type to include the view template for all new elevations:

If you want to temporarily change the scale or visibility of a view without messing up the view template, there's a tool for that. It's called Temporary View Properties and it is located on the bottom of your screen, next to the globe icon.
6- PIN EVERYTHING

Beginners delete or move things by mistake all the time. Moving grids and levels by accident is the #1 inefficient move. Please Pin (shortcut: PN) everything. Elements need to be Unpinned before they can be moved or deleted.
https://revitpure.com/blog


